This summer I bought a Falcon San Remo bicycle off of Craigslist. The bike was a nicer bike in its day (probably 1968-69) with highish end components and a very nice hand brazed Reynolds 531 steel frame. While the bike was all there, it (and the components) had all seen better days. There was no real damage, but the frame looked as if it had spent at least a few summers out in the Texas sun, with some spots faded almost to the bare metal. I suspect the paint in the sixties wasn't all that fantastic to start with, and the years had not been kind.

This isn't a great picture, but it's the only one I have of the bike in its original build. It was a wierd mishmash of Campagnolo and Shimano parts, with a no name cottered crankset (that was super wobbly) and sew up tires. I tuned it and rode it for a week or so, but I don't care for downtube shifters, so I decided to take all of the shifting gear off and run the bike as a fixed gear. While it was set up as a fixed gear, I rode the bike just about every morning in the summer and grew to love the way it rode.
I agonized for a little bit about keeping it original and putting it back together as it was built, but then I realized that life is short, I like this frame, and it's just a bicycle for Chrissake. I decided to modernize the frame by refurbishing the frame itself and putting on a modern STI group. If you aren't a cyclist (or haven't ridden in a long time) you are probably unaware of modern shifting - the shift levers on your downtube are gone, replaced by levers integrated in the brake levers. When riding with STI, you don't need to remove your hands from your handlebars to shift. I'm late to the party, but it really is fantastic.
I ordered my replacement stickers from a guy in New Zealand who makes restoration stickers for all of us bicycle nerds and started dissasembling the bicycle. Once stripped, I documented where the stickers were on the frame, cold set the droputs to accomodate the new drivetrain, and sent it off to the powdercoaters.
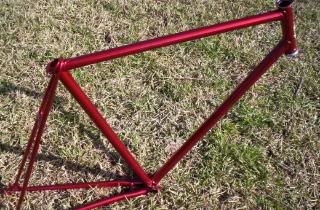
I just got photos back and the color is almost an exact match to the original.
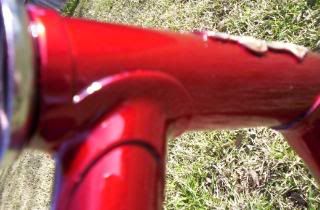
Unfortunately, in the process of taking these photos, the powdercoater managed to chip the frame coat.Since he is out of that color, I will have to wait another week to have the frame in my hands to start the next steps. In the meantime I'll wait for Santa to bring me my new buffer so I can polish some of the pieces that are going back on the frame.
Here are the photos of the freshly coated frame.

Entire frame

Headtube w/ lug detail.

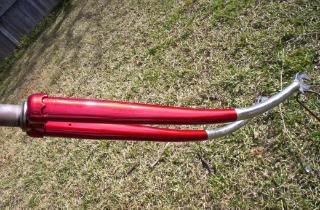
Fork
Justin, who did the powdercoating and are you satisfied with it? It looks like he kept the lug detail in tact.
ReplyDeleteChris
I had it done by Ideal Coatings in Garland - he did a good job, but not perfect. The frame ended up with a chip on the top tube that caused me to move the top tube sticker, and there is a small spot on one of the lugs where the coat didn't take - I suspect that the lug is chrome and that prevented the powder from sticking. In addition there is some overspray on the headbadge that I will have to clean up before I repaint the details. Overall, for the price ($50 frame and fork) I feel he did a good job. I'd prefer perfection, but you get what you pay for, and I feel like my $50 was well spent - especially as the color is such a match to the original.
ReplyDeletehttp://www.ideal-coatings.com/index.html
He is a small one man shop working out of his garage.
Oh, and if you ever want to sell that "Cowboys Schwinn", contact me first - I love it. I have a nice 10spd Suburban from the same era, and they are great, great bikes.
ReplyDelete